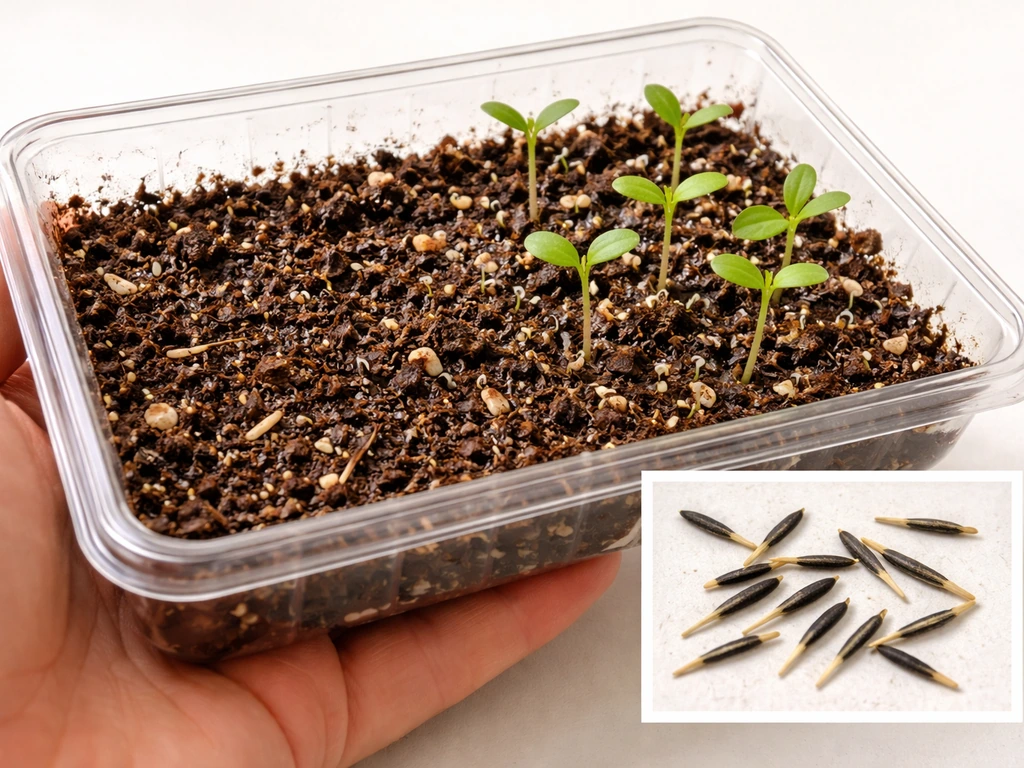
Marigold seeds are small, narrow, and dark, and their seedlings go through a very recognizable series of stages from the moment they sprout. If you know what to look for at each step, you can tell almost immediately whether your plants are thriving or heading toward trouble. Here is exactly what you should be seeing, from the seed in your hand to the first real leaves.
What Marigold Seeds Look Like as They Grow
What marigold seeds look like before you plant them
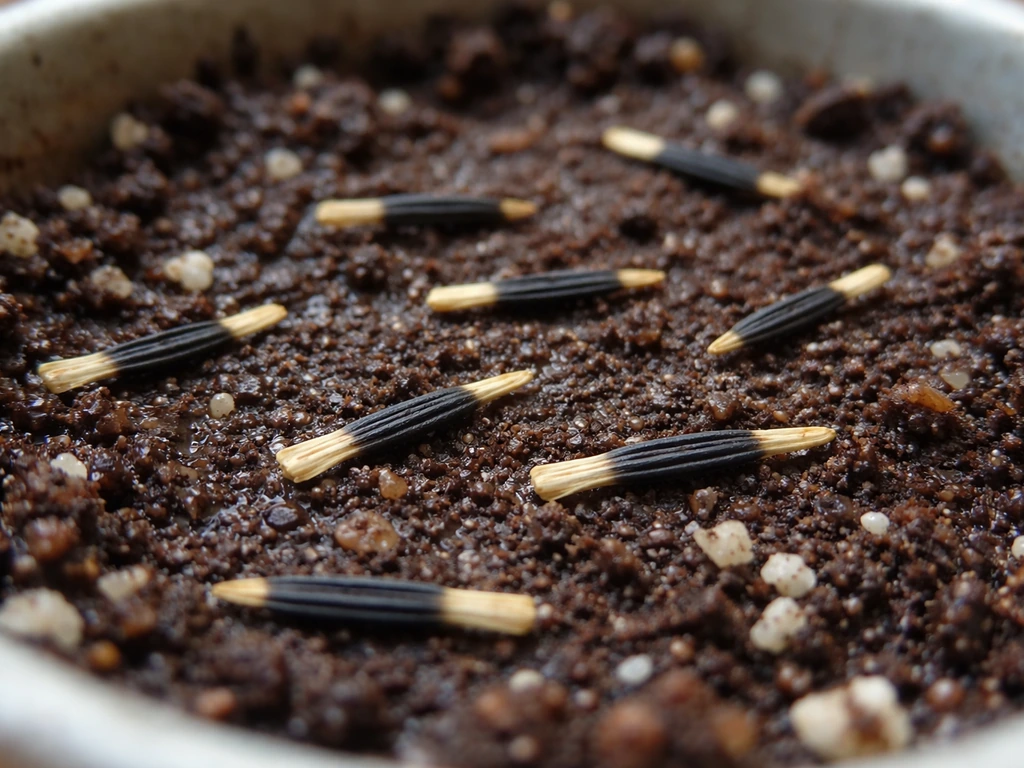
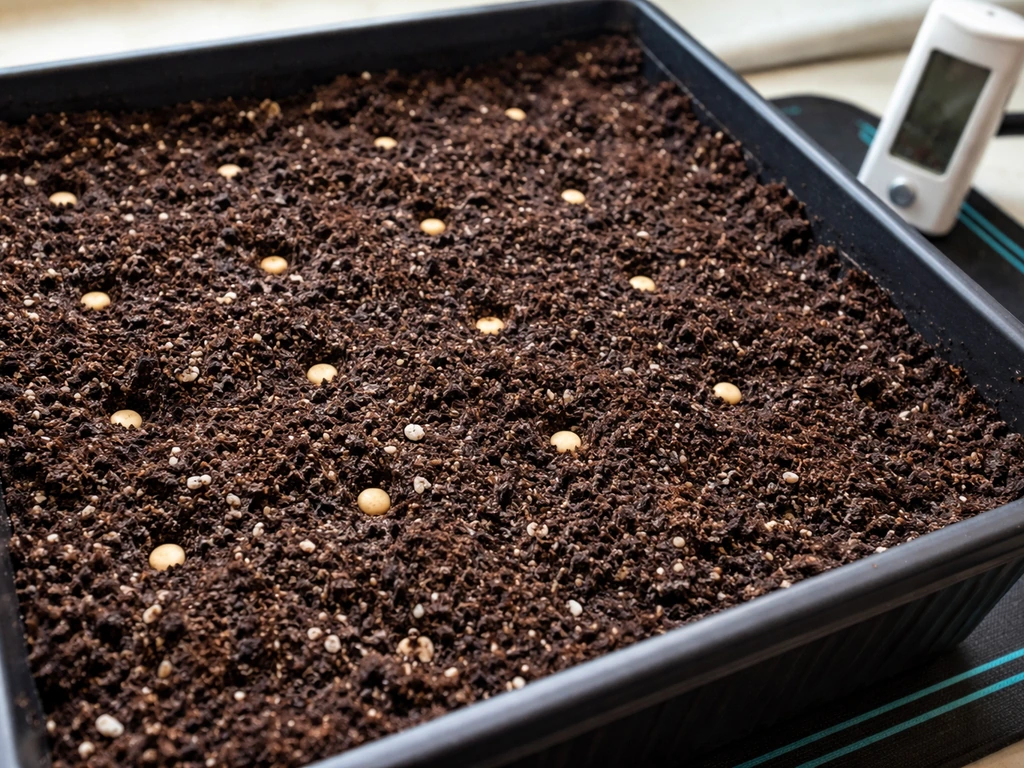
Marigold seeds (Tagetes) are small and elongated, roughly 3 to 4 mm long for French marigolds (Tagetes patula), though African marigold seeds (Tagetes erecta) tend to be slightly longer. The color ranges from dark brown to near-black, and if you look closely you can usually see faint lengthwise ridges running along the seed coat. The shape is often compared to a thin sliver or a tiny matchstick, with one tapered end and one slightly blunter end. That tapered end is the root tip. The seed has a papery, dry feel and is light enough that a breeze can scatter a small pile of them.
Fresh, viable seeds are firm and intact. If a seed crumbles, feels hollow when you press it between your fingers, or looks pale and grey rather than brown-black, it is likely old stock with poor germination potential. Because the seeds are so narrow, they are sown with only a light covering of soil or seed-starting mix, about 1/8 inch deep at most. Some growers almost surface-sow them. Going deeper than 1/4 inch slows or prevents germination.
What happens right after sowing: the germination window
Once the seed is in moist, warm media, germination is surprisingly fast compared to many flowers. At the ideal soil temperature of 75 to 80°F (24 to 27°C), you can expect sprouts in as little as 4 to 7 days. In professional plug production settings where temperatures are dialed in tightly around 72 to 75°F, growers often see germination in 3 to 5 days. If your mix is cooler, say 65°F or below, germination will drag out to 10 to 14 days or may stall entirely. Temperature is the single biggest factor controlling how fast marigolds wake up.
Visually, the first thing that breaks the soil surface is a tiny curved hook, sometimes called the hypocotyl arch. It looks like a thin green or pale yellow loop pushing up through the mix. This hook straightens over the following 12 to 24 hours, pulling the two cotyledons (seed leaves) upright with it. The moment you see that hook, germination has succeeded and the seedling just needs light to start turning green.
What healthy marigold seedlings look like
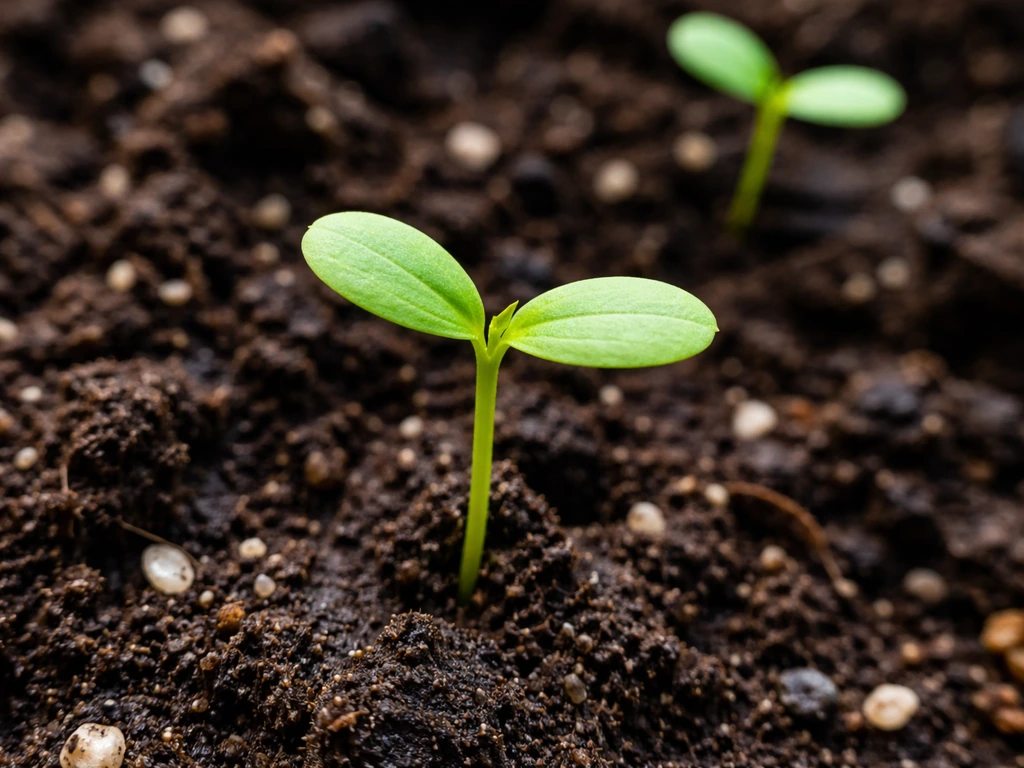
Right after the hook straightens, you are looking at a seedling with two small, oval, slightly fleshy cotyledons sitting on top of a thin stem (hypocotyl). The cotyledons are the seed leaves, not the true marigold leaves, so do not expect them to look like the jagged foliage you associate with mature marigolds. They are smooth-edged, softly rounded, and typically pale to medium green. At this point the seedling is only about half an inch to an inch tall.
The stem at this stage should be relatively upright and green to light purple-tinged, depending on the variety. It should not be white, translucent, or falling sideways. The stem base should look clean and firm where it meets the soil. If you see the seedling standing straight with plump cotyledons under decent light, you are in good shape.
True leaves appear roughly 7 to 10 days after germination, depending on temperature and light. These first true leaves are where marigolds start looking like marigolds. They are noticeably more elongated, slightly serrated or lobed along the edges, and have a stronger, herbal scent when brushed. They also tend to be a deeper green than the cotyledons. Once you have one or two sets of true leaves, the seedling usually shows the darker green, pinnately divided foliage that will become the plant's signature look.
Stem, spacing, and leaf details to watch for
- Stem color: green to light purple-green, firm and opaque, not white or translucent
- Stem thickness: thin but self-supporting, roughly the width of a toothpick at the cotyledon stage
- Cotyledons: two smooth, oval, pale-to-medium green seed leaves sitting opposite each other
- True leaves: pinnately divided with serrated leaflets, darker green, distinctly marigold-scented
- Height at true-leaf stage: roughly 1 to 2 inches when growing under adequate light
- Seedling spacing: if sown in a tray, thin or prick out so each seedling has at least an inch of clearance to prevent crowding and damping-off
Common "is this normal?" moments and what they actually mean
Because a lot of people search this question when something looks off, let's go through the most common confusing appearances one by one.
Damping-off vs. a healthy seedling
Damping-off is a fungal condition and the most alarming thing a new grower sees. The seedling looks fine one day and the next the stem at soil level turns brown, darkens to near-black, and goes soft or shriveled, like a wet wire. The plant then collapses sideways. Sometimes you will see cottony or web-like fuzz at the soil surface or on the stem base before the collapse happens. This is not a watering fix, it is a disease. Once damping-off sets in on a seedling, that plant will not recover. The cause is almost always a combination of overwatering, poor air circulation, and too-warm standing moisture.
A healthy seedling's stem base stays green, firm, and consistent in color all the way to the soil line. If you see the stem thinning or discoloring only at the very base, act immediately: improve drainage, reduce watering, and increase air movement around the tray.
Leggy, stretched seedlings
If your seedlings are tall, pale, and flopping over even though they have not collapsed from disease, they are etiolated, which just means they are stretching toward insufficient light. Marigolds are sun-hungry plants and will visibly reach under low light within just a few days of germination. The stem becomes long and spindly, the cotyledons stay small and pale, and the plant looks weak even if it is otherwise healthy. Move the tray much closer to a grow light (2 to 4 inches under fluorescent or LED panels) or into direct outdoor sun if temperatures allow. This is fixable early, but if the stem gets very long before you correct it, the plant will always be a bit weaker at the base.
Seeds not sprouting
If nothing has appeared after 10 days, the most likely causes are: soil temperature below 65°F, seeds sown too deep (more than 1/4 inch), the mix drying out between waterings, or old/nonviable seed. Check temperature first, it is the most overlooked factor indoors. A heat mat set to 75°F under the tray makes a dramatic difference. Also gently probe the soil to check whether the seeds have rotted or have not yet moved, which tells you whether you have a rot problem (overwatering) or a temperature/timing issue.
Slow germination but seeds look intact
If seeds are present and unrotted but just slow, it is almost certainly a temperature issue. Marigolds are warm-season plants and they are not in a hurry at cool temperatures. At 65°F germination can take two weeks or more. At 70°F you are looking at 7 to 10 days. At 75 to 80°F you get 4 to 7 days. Raise the temperature and be patient for another 5 to 7 days before writing off the batch.
Yellowing cotyledons
Slightly yellow cotyledons can happen for a few reasons: overwatering and waterlogged roots, nitrogen deficiency in a seedling mix with no nutrients, or the seedling naturally shedding its cotyledons as true leaves take over. If the true leaves coming in behind them are green and the stem is healthy, yellowing cotyledons are usually nothing to worry about. If the true leaves are also pale or yellowing, check your watering frequency and consider whether your mix has any starter nutrients.
When marigolds start looking like real plants: timelines by variety
The two main types most home gardeners grow are French marigolds and African marigolds, and their timelines from seed to recognizable mature plant are noticeably different.
| Variety | Days to germination | True leaves visible | Transplant-ready | Weeks to flowering from seed |
|---|---|---|---|---|
| French marigold (Tagetes patula) | 4–7 days at 75–80°F | 7–10 days after germination | 4–6 weeks after sowing | 8–10 weeks |
| African marigold (Tagetes erecta) | 4–7 days at 75–80°F | 7–14 days after germination | 4–6 weeks after sowing | 10–14 weeks |
| Signet marigold (Tagetes tenuifolia) | 5–7 days at 75–80°F | 10–14 days after germination | 4–6 weeks after sowing | 10–12 weeks |
French marigolds are the fastest and most forgiving. By week 3 after germination, most French marigold seedlings already have two to three sets of true leaves and look unmistakably like marigolds. African marigolds grow more slowly as seedlings, staying in a juvenile-looking stage longer before they put on rapid height. If you are starting African marigolds to bloom by a specific date, count back at least 10 to 12 weeks from that date, and if you want flowers in packs or containers for display, sow about 8 weeks before your desired bloom time as a minimum.
The transition from seedling to mature-looking plant happens noticeably around weeks 4 to 6 after germination. At this point, French marigolds will show bushy branching and the characteristic deeply divided, pinnate leaves. African marigolds will have thick, sturdy stems and large, noticeably fragrant foliage. Both types will look like small, compact versions of the mature plant rather than generic seedlings.
What to do at each stage to keep growth on track
- At sowing: Keep soil temperature at 75 to 80°F using a heat mat if your indoor space is cool. Sow seeds shallowly, no more than 1/8 inch deep, and press them lightly into moist seed-starting mix. Cover the tray with a humidity dome until germination begins.
- At germination (days 4 to 7): Remove the humidity dome as soon as the first hooks appear. Immediately move the tray under strong light, within 2 to 4 inches of a grow light or into a sunny south-facing window. Keeping the dome on past this point increases damping-off risk.
- At the cotyledon stage (days 7 to 14): Water from below or use a gentle mister. The goal is consistently moist but never waterlogged media. Let the surface dry slightly between waterings but never let the mix go bone dry. Provide at least 14 to 16 hours of light per day under grow lights.
- At the first true-leaf stage (days 14 to 21): If you sowed multiple seeds per cell, thin to one seedling per cell by snipping the weaker seedlings at soil level, do not pull them out. Begin very light fertilizing with a half-strength balanced liquid fertilizer if your seed-starting mix is nutrient-poor.
- At the two to three true-leaf stage (weeks 3 to 5): Begin hardening off if outdoor planting is approaching. Move seedlings outside for increasing periods of time each day, starting with an hour of morning sun and building up over 7 to 10 days. Protect from wind and temperatures below 50°F.
- At transplant (weeks 4 to 6): Transplant into garden beds or larger containers after the last frost date in your area. Space French marigolds 8 to 10 inches apart, African marigolds 12 to 18 inches apart.
Troubleshooting seeds that do not look like they are growing
Run through this checklist before giving up on a batch of seeds:
| Symptom | Most likely cause | Fix it today |
|---|---|---|
| Nothing after 10+ days | Soil too cold (below 65°F) | Add a heat mat, target 75–80°F |
| Nothing after 10+ days | Seeds sown too deep | Re-sow at 1/8 inch depth in fresh mix |
| Nothing after 10+ days | Mix dried out repeatedly | Water more consistently; use a humidity dome until sprouts appear |
| Seeds rotted in mix | Overwatering or poor drainage | Use fresh well-draining seed-starting mix; water less |
| Seedling collapsed at base | Damping-off (fungal) | Remove affected plants; increase air circulation; reduce watering |
| Seedlings tall and pale | Insufficient light | Move grow light to within 2–4 inches or move tray to direct sun |
| Yellow cotyledons, green true leaves | Normal senescence or minor stress | Monitor; usually fine if true leaves are healthy |
| Slow but steady growth | Cool temperatures (65–70°F) | Raise temperature or be patient; germination will come |
Most marigold germination problems come down to three things: temperature too low, sowing too deep, or inconsistent moisture. Fix those three variables and marigolds are genuinely easy to start from seed. They are one of the more reliable flowers for beginners They are one of the more reliable flowers for beginners precisely because, under the right conditions, they move fast and visibly reward you within the first week.
Once you are confident identifying healthy growth at each stage, you will find the whole process much less nerve-wracking. A tiny curved green hook pushing through the soil surface on day 5 is one of the most satisfying sights in seed starting. For more on timing your sow dates and transplanting outdoors correctly, check out the guides on when to grow marigold seeds and how to grow marigold seeds, which cover the full season planning and step-by-step growing process in detail. how to grow marigolds without seeds
FAQ
My marigold sprouts look stuck in the seed coat. What should they look like instead?
After germination, marigolds should look sturdier each day, with the hook straightening and then cotyledons expanding. If you see a green hook but it never turns upright after about a day, check for crusting or soil that is too dry. A dry crust can trap the cotyledons so they stay stuck in place and stop developing.
How can I tell if pale cotyledons are normal or a sign of disease?
Cotyledons naturally look smoother than mature marigold leaves, but they should still be firm and green to medium green, not thin and collapsing. If the cotyledons look glossy and the stem base is also soft or dark, that points to damping-off risk rather than a normal leaf-stage.
What should the transition from cotyledons to true leaves look like on day 7 to day 14?
The first true leaves often appear as the plant “looks like a marigold” because the edges become more distinct and slightly serrated or lobed. If your seedlings remain only two smooth ovals with no change for 10 to 14 days, revisit soil temperature and sowing depth first, then check whether the tray is getting enough warmth at night.
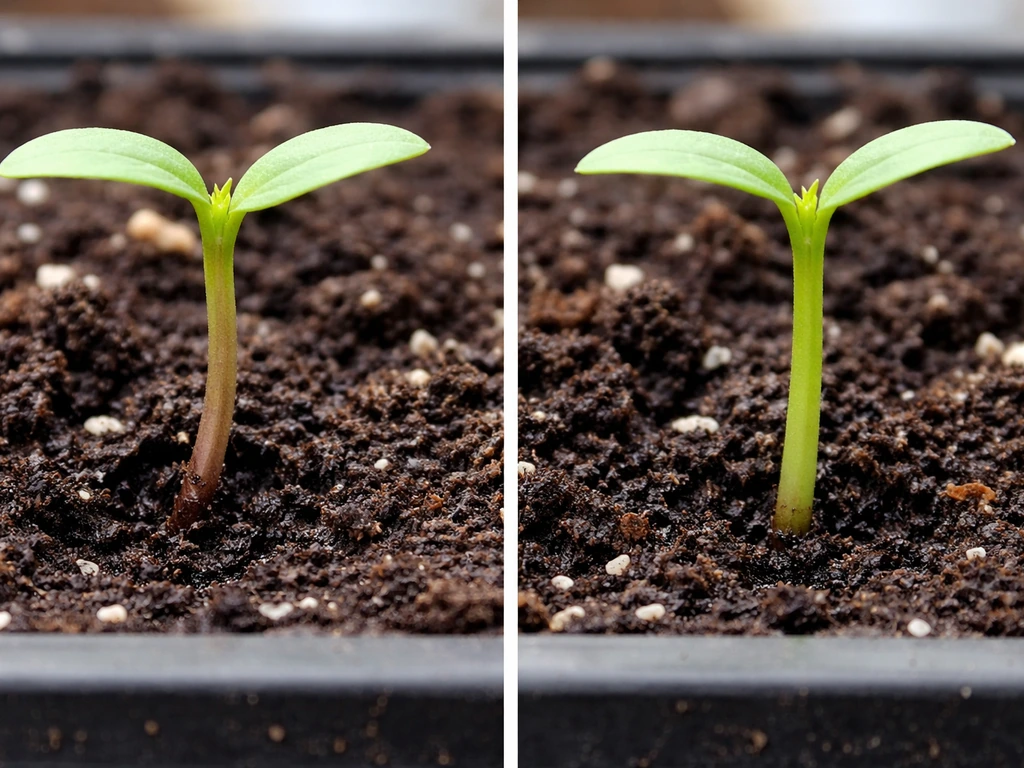
Is it normal for the stem to turn slightly purple in early marigold seedlings?
Yes, marigold seedlings can show a slight purple tint on the stem, especially under cooler conditions or stronger light, and that is not automatically a problem. What matters is that the stem stays upright, green overall (with only light purple), and the base stays firm at the soil line.
My seedlings are pale and slow, could my watering method be causing it even if I water carefully?
If you use bottom watering or keep the surface consistently damp, the soil can stay waterlogged even if you are not “soaking” from the top. A useful check is to feel the mix 1/2 inch down, it should be evenly moist, not soggy. If it stays heavy and wet, reduce watering and improve airflow right away.
What should I do if my marigold seedlings are tall, thin, and leaning but not damping off?
If seedlings stretch but do not collapse, the fix is to increase light intensity and get the light closer, then keep temperature in the target range. Avoid suddenly moving very stretched seedlings into harsh full sun outdoors because they may sunburn, instead harden them gradually over several days.
How can I check whether a problem is damping-off versus poor germination without losing the whole tray?
Look for a combination of signs: stable green stems, no darkening at the base, and healthy cotyledons that do not shrivel. For rot diagnosis, gently lift one seedling by the leaf and check the stem base and roots, damping-off usually shows dark, mushy tissue at the soil line.
Why did my germination go slow after starting fine, even though my daytime temperature seemed warm?
Marigold seedlings are sensitive to being too cool, and indoor temperature swings matter more than many people expect. If your room drops at night, the mix temperature can fall even when daytime feels warm. Using a heat mat or keeping the tray in the warmest part of the house often brings germination back into the 4 to 7 day window.
After 10 days with no true leaves, what is the best troubleshooting order?
If you see no true leaves after about 10 days, and the stems are still not developing, assume the seeds either never germinated or are slow from conditions. The highest-impact troubleshooting order is temperature, sowing depth, and then moisture consistency. Only after those are confirmed should you replace seed or suspect viability.
Do French and African marigolds look different during the seedling stages?
French and African marigolds look different early on in how quickly they “read” as marigolds. French types typically form multiple sets of true leaves by about week 3, while African seedlings may stay juvenile longer, even if conditions are perfect. When judging progress, compare your timing to the specific type you planted.
What are the most common sowing mistakes that change what marigold seeds look like as they grow?
A common mistake is covering seeds too heavily and then keeping the tray too wet to compensate. Because marigold seeds are narrow and require only a light covering, aim for around 1/8 inch and ensure the top layer does not stay waterlogged. If you suspect seeds were sown too deep, gently adjusting conditions for warmth usually helps, but deeply buried seeds may never fully emerge.